If you’re interested in working together on a project, here’s a bit of a look into my working process when illustrating a children’s book.
1) Before Work Begins :
After we’ve had a chat about your story and decided we’d like to work together, the first thing I do is put together a contract or statement of work. It’s good practice to have a contract between author and illustrator to protect both parties. It can seem formal and detailed, but putting the details on paper ensures both the author and illustrator have the same expectations of the process & outcome of working together. Things like budget, how long will it take to complete, how many illustrations are expected, what happens if either party changes their mind, etc. Any questions or details the author wants can also be added to the contract.
2) Brainstorming & Research
Before pencil hits paper, I gather my reference materials and resources. After chatting with the author about their vision for the story and characters, I flip through old books, photos, and online images for visual inspiration. With kids books you’re working with 15-30 illustrations, so that’s a fair bit of room for fun ideas. I like to make a brainstorming board (PDF) of images, colours, ideas for the author to have a peek at. If all looks good and ideas are budding, I’ll move onto the next phase.
3) Cobweb Removal Phase :
Once I’ve gathered my reference materials, I read the new story again and scribble and write notes of whatever comes to mind first. Even if it is the most obvious boring idea, I just sketch and write it down to get it out of my system, doing the same for every page of the book. Brainstorming like this is like brushing away the cobwebs to make room for the better ideas. I then revisit my horrible sketches the next day, and have another go… it’s usually in this second round of tiny rough sketches that the ideas start to really come together.
4) Sketches :
Once I’m happier with the ideas, I draw to scale with pencil a more finished sketches of the story. Then I scan them, put them in a layout program with the text from the story, and send a PDF of the sketched out storybook to the author. It is then in the hands of the author to give me feedback… bits they like, bits they don’t, ideas that come from those first sketches. After the author has got back to me, I revise and redraw the sketches again, before sending the revised PDF of sketches back to the author for more feedback. There can be a lot of back and forth at this point in working together, but it is well worth it… it’s far better to iron out any kinks at this stage, than once the final paintings are done.
5) Color Proofs :
Before delving into the final illustrations, I like to do a rough colour mockup of the story. (Up to this point the story has been in black and white.) Again, I send these small, rough mockups to the author for feedback. And if all is looking good, I start on the final illustrations!
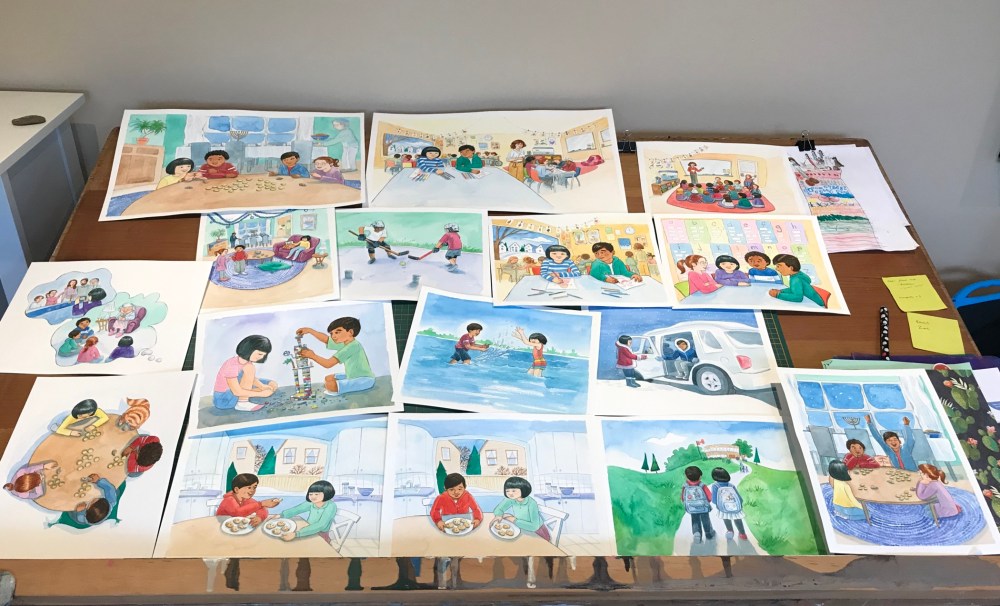
6) Final Illustrations :
This is the longest stage… up to this point there is a lot of back and forth with authors, but at this point I just need some time to paint. I like to work on all my paintings at once… I set up my paper across 20 or so wooden boards, and build them all up layer by layer. It keeps me busy so I am not waiting for paint to dry, and it maintains consistency of colours and characters throughout. I like to take pictures of the illustrations as I go and send them to the authors so that they can be involved and see the illustrations finally come to life.
7) Reviewing Finals :
Once the illustrations are done, I scan them, colour correct them in Photoshop, and place them into an InDesign layout with the text. I then send this e-book PDF to the author to have their first look at their illustrated story. At this stage minor changes can still be made digitally (adjusting colour, little tweaks here and there).
8) Delivery :
When the illustrations are approved, I send digital copies of them to the author or publisher via Dropbox or a link to an FTP site. The files include all the high-resolution illustrations, ready to be used in a book layout by your publisher. If the author wishes me to handle the graphic design of the story, I would continue to work at this point with the publisher to prepare the layout of the story for print, including text, cover design, end pages and dust jackets.
9) The life of your book :
I love hearing from my authors and publishers once our books have been published. It’s very satisfying when the samples arrive and holding the finished product in your hands. From this point on it is in the author and/or publishers hands start promoting and selling the book. For my part, I will post links to where the book can be found through my website.
So thats it! If you have any more questions or want to chat about your project, I’d enjoy hearing from you.

